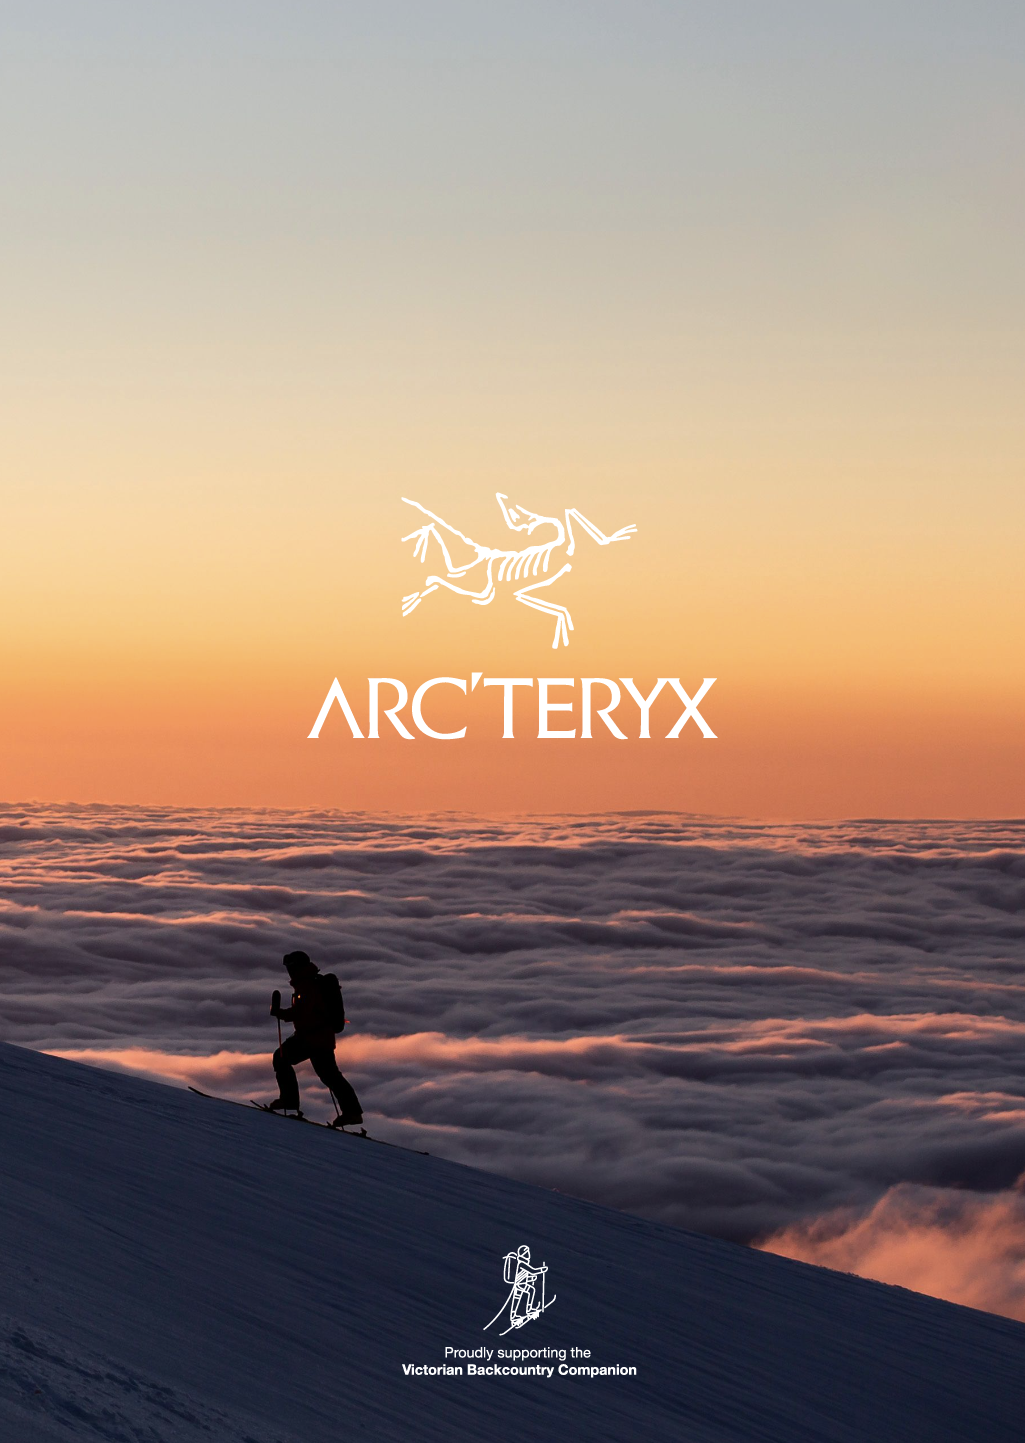
The Razorback: Victoria’s ultimate skyline traverse.

Victoria’s ski touring ‘Golden Miles’. You’d be hard pressed to find a more scenic tour in the state, or the country for that matter.


The Razorback is the striking ridge line seen from the Great Alpine Road as it rounds the hairpin up past Diamantina Hut. Probably the most photographed alpine vista in the country and deservedly so. This is a ski touring paradise with epic scenery, easy access and Mt Feathertop as the prize, assuming the conditions are favourable. Certainly on the ‘to-do-list’ of any touring party in its own right, with plentiful steep ridges and bowls along the way to explore. Strictly a ‘fair weather’ objective at the ‘intermediate’ rating. This tour description is ‘one way’, in to Cairn Hill, double the distance for the return journey. This tour interconnects with Bungalow Spur, Mount Feathertop Summit and North Razorback beyond the summit.
People do this tour every which way. Here we describe a few campsite options along the way. Increasingly parties ski as far as the shelter at Timber Point on Day 1, skiing a few bowls along the way, then ‘Day Tour’ to Feathertop and back Day 2, then back out… or variations of that, including going through to Federation Hut and out via Bungalow Spur with some prior car shuffling. Some go all the way out and back in a day. We will also describe some of the ‘extra curricular’ terrain along the way.
Unlike the northern continuation of the razorback beyond Feathertop, the southern extent of the Razorback stays high and exposed for the majority of the distance. On a cautionary note, this ridge racks up as many rescues as Mt Bogong. Usually involving less experienced parties, lured ever onwards by the tangibility of the Mt Feathertop summit in what appears to be a ‘quick jaunt’ on a clear day. Alas, ‘Feathers’ is big and the distance is deceptive. We rate this as an intermediate tour, in good conditions with an ample weather window. Anything less and this tour will fast enter advanced category. As you can see in the image above, the route follows a sometimes very narrow ridge flanked on both sides by steep open faces. Beware of corniced ridges and always travel well back from the edge.

Here we will start at the trail head on the Great Alpine Roadside exactly 27km from the gate at Harrietville. Best to park well off the road here on the south side (opposite from the trail), as the snow clearing operations can be pretty loose at times. The privilege of parking here for any more than 20minutes is the day rate for vehicle entry. It’s foolish to think that you will get away without paying. RMB fees are payable. Parking inspectors are a unique breed and this has got to be the best parking inspector job in the country when you get to enjoy that view routinely, so it attracts the best in business.
The distinctive ‘A’ frame of Diamantina Hut sits up above the carpark and is about as dingey a hole as a ski resort could possibly keep, probably strategically with a view to deterring overnight stays. However, you have every right to use this accommodation if needed. Common sense says starting out late is never a good idea, and camping in this hut is not really great. If you are winding your way up the road after say 2pm you will have missed the window to get to a camp site with decent shelter before it gets dangerously late.
The Snowline Hotel in Harrietville has a motel as does The Wandiligong Pub. Another option is JB Plain Hut beyond the resort boundary before Dinner Plain, or for those visiting from the Omeo side just after Dinner Plain. JB is an established ‘ski-bum’ setup, so google that. There is the Mt Hotham Ski Resort just around the corner however with covid carryover this year its likely booked out well in advance. Smoko riverside campsite is another option on the way in from the west.

Once you have crossed the road and travelled 200m along the ridge you are technically in the Alpine National Park. This can lead to confusion in a rescue situation so in this case start with calling 000 in any event. A rescue along the razorback is not easy. The terrain makes for challenging over snow transport should that be attempted. Most likely extractions will be via furno sled, back the way you came. Likely by VicPol SAR in concert with local area experts Hotham Ski Patrol. Airlift is likely the best contingency in a serious incident if the conditions permit.

Travelling light and fast with pattern based skis in perfect conditions (corn) is certainly popular out along the ridge. The undulating nature of the terrain coupled with saving time with transitions makes the skin free prospect attractive. That is, only if you can avert your eyes from the obvious side terrain along the way. Similarly the lighter touring gear isn’t well suited to the advanced terrain on Feathertop. Our recommendation, to explore and enjoy all that this venue has on offer would be standard touring kit, tech bindings, skins and ski crampons. Split boarders probably work a bit harder with more downhill skinning. Having sussed the conditions, there are opportunities to make long gentle traverses down onto the faces on the eastern aspects, followed by steep climbs back up to regain the ridge. Beyond Timber Point there are some tight treed ascents (descents on the way out), with the solar aspects often holding deceptively shallow cover as spring approaches.

Reckoning (knowing where you are)
On this tour there is a mixed bag of navigation requirements. The most fundamental element is the ‘Geographic Hand Rail’ technique (more info on handrail nav here) . If all else stops making sense, vis is low and the wind is up, using the high ground of the ridge itself is your best navigational reckoning, in either direction of travel. Twin Knobs is an exception to this rule and is outlined below. Also, taking an altimeter watch (freshly calibrated) is handy when reckoning in the forest stretches and picking up the track to Federation Hut on the west side of Cairn Hill (1765m to be precise). Snow poles are in a very sore and sorry state and along the way there are Parks way finding signs, although likely buried for the majority of the season.
Wayfinding (connecting the dots on a map)
We strongly recommend the MSC Feathertop / Loch map and compass en-route in conjunction with either the 1:25000 Vic Map sheets (yes, there are two) or plenty of back-up charge for your GPS or Phone using our GAIA plot here for emergency reckoning (aka. when you are lost). Occasionally we will provide bearings so you need to know how to follow bearings from a compass, firstly as Cardinal (north, south, east and west, or variations ‘south west’) or for long sections on specific headings we use decimal (eg: 145˚). Do not rely solely on digital navigation in the Backcountry. The cold temps are brutal on the charge rate of your devices. Always turn devices off when travelling as they can interfere with avalanche beacon frequencies.


Mount Feathertop, The Razorback, Mount Loch and Machinery Spur
Map and topographic guide to Ski Touring and mountaineering.
Little Dipper - Big Dipper - Dipper Saddle
This will read like a day tour guide to Mt Hotham backcountry as most of the ridge as far as Timber Point is frequently a day-trip objective. From the Parks Victoria information board and intention book station, the tour drops down to a shallow saddle 300m from the car park yet only 30m elevation drop. Usually people will have skins on from the carpark as this is such a short drop to transition for ahead of the ascent to the summit of Little Dipper (1742m). The 500m ascent along the ridge is often corniced on the east side. Prudence says favour the west side where possible, also avoiding the exposure above 40˚south face as the summit is gained. Here the party needs a strong resolve in the objective, either: A) Go the distance, favouring getting to Federation Hut before nightfall, or B) have fun in the process. Enjoy good conditions, completely self sufficient and happy to camp out somewhere along the way.
A) Going the distance, in pragmatic terms means leaving the skins on here, skin-skiing down to the shallow saddle on a north west bearing continuing along the ridge to Big Dipper summit. Transition at the top and descend on a north east bearing to skier’s right of Shroud Hill cornice if avalanche conditions are good, or scootch over the shoulder to drop down to Dipper Saddle.
B) ‘Fun in the process’ involves transitioning to downhill mode at Little Dipper summit and descending first north, then north east to sneak over the top of ‘the gums’ to the ridge and into First Dip Gully, then down to elevation 1600m. Then transitioning to pick up the north bearing to regain the ridge at Dipper Saddle or beyond at the summit of Washington Point (1740m). In windy conditions, poor visibility and or times of avalanche danger this is not a bad option. In practical terms route finding is to travel along the treeline, or just above, until beyond Shroud Hill and then ascend. For strong teams with quick transitions this ‘short cut’ takes the same time as ‘going the distance’. The reality is that this is in fact a ‘long cut’ time wise, as the traverse back up is, for some, long and arduous with laden packs.
Washington Point 1740m.
At Washington point you are 2km out from the trail head. There are quite a few camping options here if your intention is to explore the terrain options of South Razorback. East of the summit rise (no cairn or signage) extends a face that divides either side of a ridge at 1640m. This ridge has relatively sheltered flat camping spots at Col Camp. 300m further north from Washington Point, again on the east side, a drift forms at 1700m in the ‘hanging valley’, people have ‘holed up’ here and claim it to be comfortable and sheltered. If this looks poorly formed then another option is to continue and descend around the next gully then east to the broad flat ridge top of ‘North Arm’ at elevation 1600m. These are the only camping options outside the exposed ridge top between here and Timber point, a further 2km along the exposed ridge top.
Onwards along the Razorback, leading to Telleson Point on the east aspect is the ski terrain of ‘Hermans Recliner’ with the aforementioned camping options, then the Hidden Valley (obscured from the road). The route here is on the broad ridge top all the way, slightly descending to the right to hold the contour and skirt skier’s right of the Telleson Point promontory to reach the flat. From here, march north to the tree line at Timber Point, the point at which the dead timber breaches the ridge top. Then it’s a short treed drop down to Camp Notch.
Camp Notch 1610m
As the name suggests this is a popular and geographically obvious area to reckon, summer or winter. The camp site is east of the ridge in a small clearing. Still fairly exposed, although better than the alpine ridge line that you have just traversed to as far as overnight options on the ridge itself. Conveniently, this is also the half way point to Federation Hut. The tour becomes more technical from here with more challenging route finding and more intimidating terrain. Other camping options exist further into the wooded area as the old growth (still living) trees provide better shelter an extra kilometre further north at ‘Old Growth Hollow’.
South Knob and the Knuckle Face 1750m.
The ridge rises abruptly out of the old growth forest as you travel north to The Knobs. An open bowl on the east marks the point where the narrow ridge drops more steeply on each side leading up the summit of South Knob. The Knuckle Face / Fist Face is the steep burly ski area on the eastern aspect of The Razorback in this vicinity, extending north from here to High Knob. Made up of a series of 40-55˚ ridges and chutes down to elevation 1600m and named after its resemblance to a clenched fist, with the knobs forming the knuckles when viewed from the road. The technical demands of regaining the ridge after a descent in this area make Feathertop’s neighbouring south east face a better, safer?, option if you are into this sort of thing.

Twin Knobs 1770m
This is the technical crux of this traverse. The traverse follows the ridge east to South Knob then turns and heads north and broadens to the Twin Knobs. Importantly, favour the west side of the ridge as the rocky outcrop of the Twins are approached. Look west and down (Marked as Position ‘A’ in Figure 3) as the ridge ramps upward to intimidating looking crags. The route descends a short distance on the west side into a small hanging gully here. This hanging gully is a place where many have become benighted. It is actually a relatively protected, though sloping, bivy spot if emergency shelter is required. Once you are down into the hanging gully 15m below the ridge, follow it up and north again to end up exposed out on the north face of the twins. This is a ski mountaineering intro to many hapless parties. Sketchy, often icy conditions prevail here for most of winter and crampons of any description are often employed for this short 200m section. To venture onto the east face in an attempt to avoid the Twins, is more exposed to seriously big fall potential and usually corniced. If it’s really bad, just turn back and save it for another day.
If the conditions permit you will exit the west aspect onto the saddle of the ridge below the crags, with High Knob a short distance beyond. Giddy up… now you are getting there.

Drawing dusk… this shot shows the notch detailed as position ‘A’ (with Feathertop above) beneath and looker’s left of the crags on Twin Knobs. It’s worth jumping in and having a read of this little epic by Aidan Howes on the we are explorers platform, Can you work out where they went wrong?
High Knob 1805m
Ascending High Knob is not essential as, from the saddle, it can be skirted around to the west. From the summit you get your first up close and personal view of the south east faces of Feathertop. This is also the intersection of the Diamantina Spur. Camp spots exist down and east on the spur at elevation 1650m, however they can be pretty exposed to winds from every direction out there. Transition and continue down and north on the ridge which is undulating for a kilometre to the base of Cairn Hill.

Liam Wallis (foreground) and crew cresting the ridge after a quick rip on the High Knob in August conditions. Photo: Colin Levitch
Cairn Hill / Mollie Hill 1810m
As you approach Cairn Hill along the ridge there is a good flatish nook to hide from the weather in the lee of the hill. The east face is a large open face while the west is heavily treed. Immediately left of where the ridge meets the hill is the summer walking track that skirts west side of the hill. This track contours around to the summit of Little Feathertop where a short 200m traversing descent delivers you to the front door of the hut.
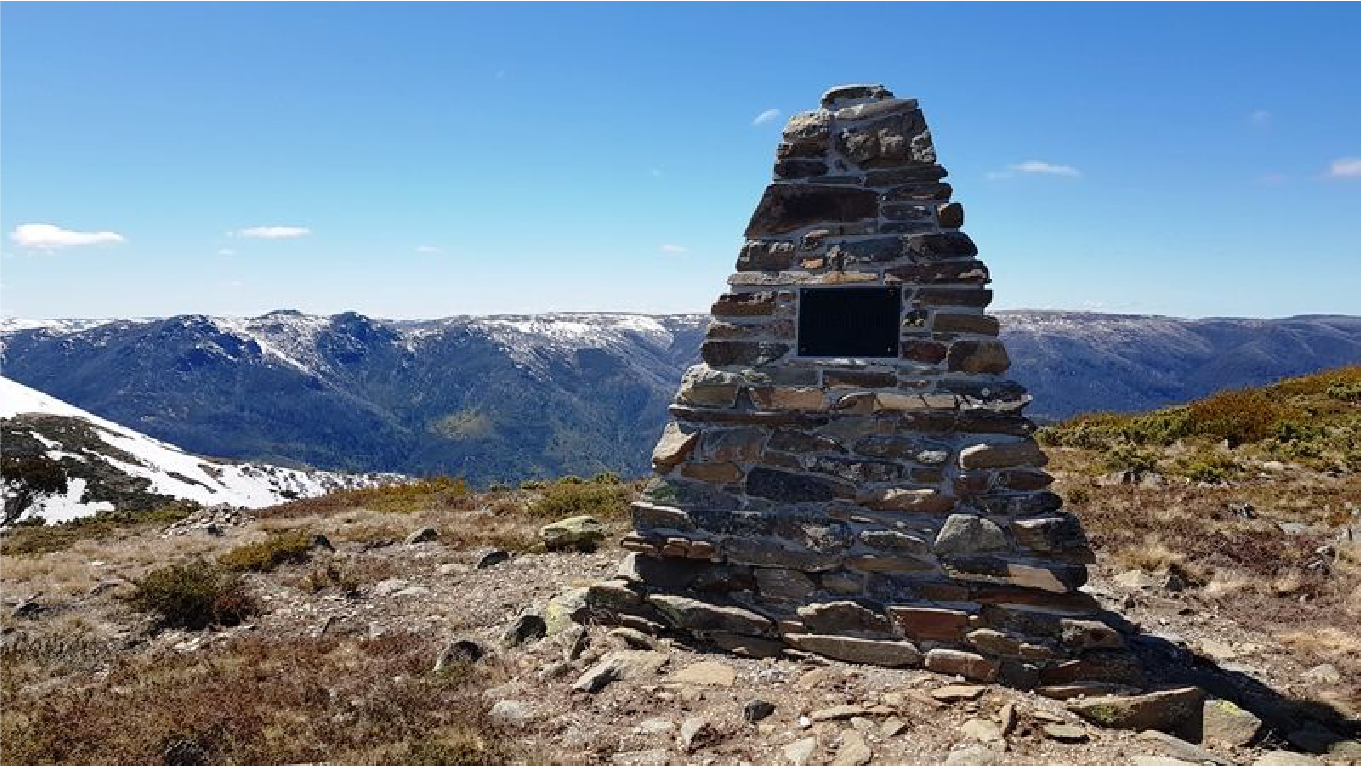
Photo: Schelli Jaremczuk
The north east face of Cairn Hill is known as Langridge Bowl. Traversing the summit you will pass a memorial Cairn to Mary Anne (Mollie) Hill. After six days of storms, on Friday 2nd of September 1932, a group of six set out for Hotham Heights from the Hut. They climbed up here, Molly slipped on a steep patch of ice and slid over 60 metres down the west face a before hitting a tree. The incident was reportedly the result of a combination of two accidents. A few seconds before she slid down the icy slope into the timber, Miss Molly Hill had fallen and broken her wrist. It is believed that she was so dazed by the first injury that she did not realise the danger of a collision with a tree. A rescue party was quickly organised and she was stretchered to Harrietville from where she was driven to hospital in Bright. Molly Hill died of head injuries later that night and is buried in the Cheltenham Cemetery.
Beyond the cairn at the saddle between Little Feathertop and Feathertop was another sobering landmark in the form of a steel pipe crucifix. In old maps this is marked as ‘the cross’. This has been removed so don't count on using it to locate the junction of the Razorback track on the north side of Mollie Hill with the Summit track / Federation Hut track. In summer there is a low sign, in winter the sign is usually buried. Head west from the saddle and you will hopefully pick up ski tracks headed in the rough direction of Fed’ Hut. To the north east is the west ridge of Mount Feathertop, and eastwards is the introductory bowl. The Razorback at this point is exposed to the full force of the valley wind funnel effect.
From here, Mount Feathertop spans the north to south east. This area is an advanced alpine arena. The easiest approach to the summit is via the south west (Bungalow) spur which presents itself to you from ‘Mollies’, or the saddle. There have been multiple incidents and a handful of fatalities on this route, the mountain’s most popular approach. Beyond the scope of the ‘intermediate’ section of this guide, an ascent of the peak should be undertaken with care. Crampons and ice axe are prudent. The ski descent is sufficiently exposed on all aspects to serious consequences to render it ‘Advanced’ terrain. Find out more here (Link coming in August 2022)