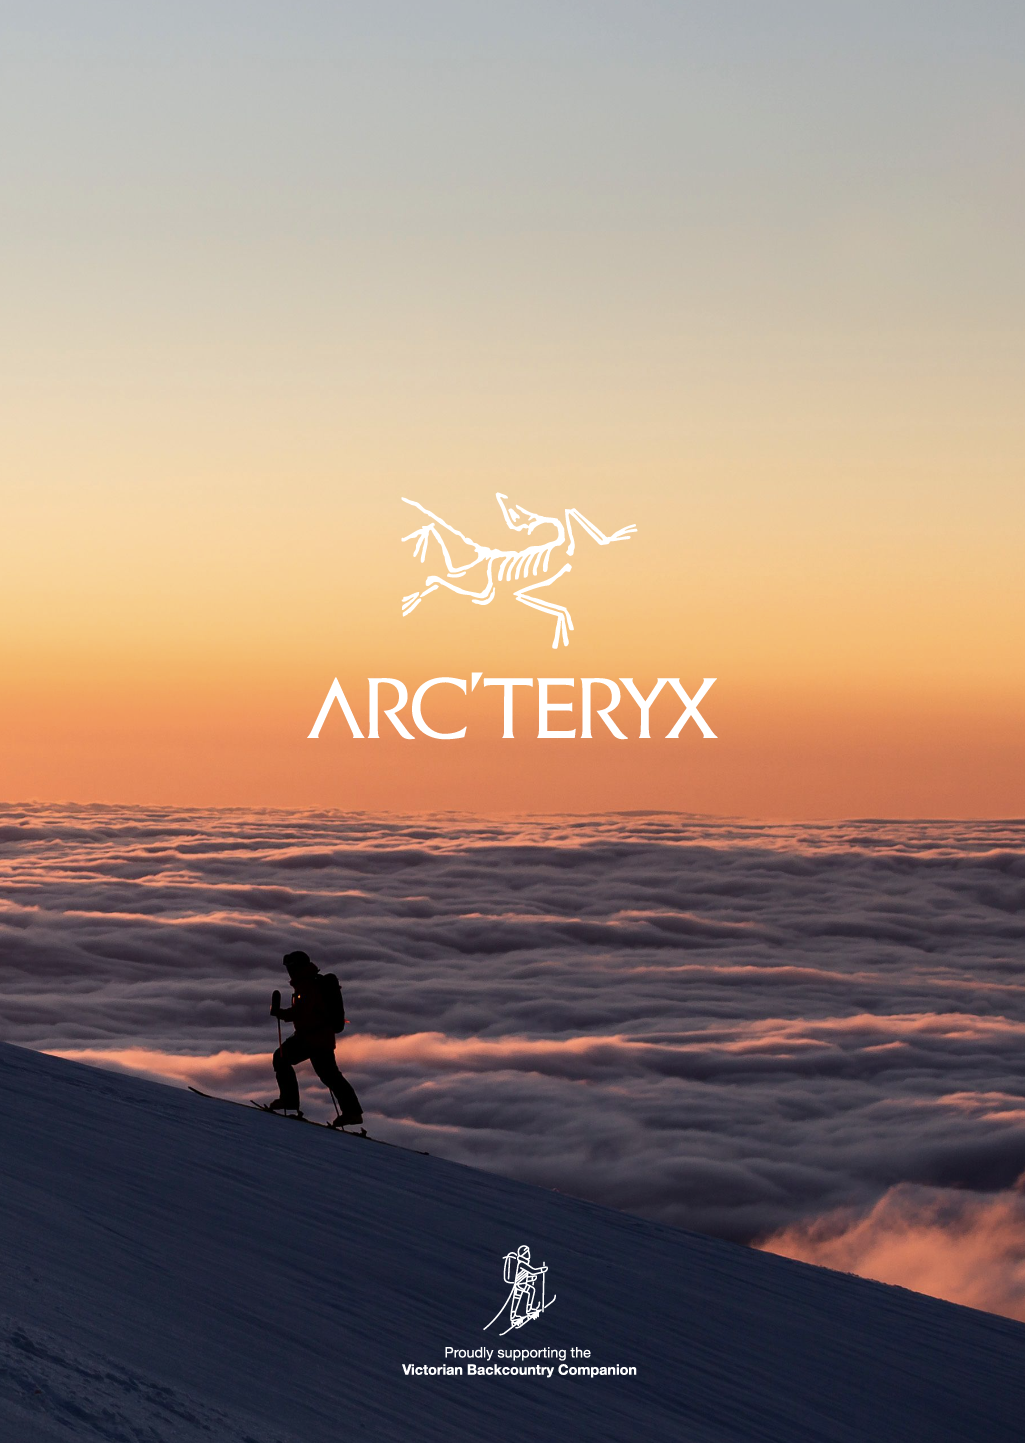
Mount Stirling: King Spur / Summit / Bluff Spur tour

Mount Stirling Summit from North spur. The East Summit on the left with Stanleys Bowl below obscured by fog, the West Summit behind Mike ‘Magic’ Goodfellow with the Dugout area on the right.
Mount Stirling has served as the cradle of Victorian free-heeling ski ambitions for generations. The summit is within striking distance (3.5hr drive) from and alpine start exit out of Melbourne and as such this popularity has entrenched the place as a backcountry playground.
Various attempts have been made to develop the place into ‘something more’. These have all failed due in a large part to the vocal opposition from both within and outside the ‘development’ bodies. This speaks to the much treasured value of this ‘natural asset’.
The tour we describe here is a ‘introduction’ to the area at an ‘introductory’ ski/split level. The companion proposes this as an introduction to extended (overnight) touring with the King Spur Hut (Hut36) is our objective. We approach the summit via the gentler northern approach: King Spur, and descend the more popular and continuous western aspect: Bluff Spur (yes splitters, we are thinking of you). The summit ridges have have three huts, two public and one emergency use. The tour notes include an alternative approach that travels into the true ‘Back Country’ as a navigation challenge for the parties looking to step up and get into the intermediate tours listed here in the companion. If you have struggled with other compass navigation challenges on the previous tours, perhaps stick to the clearly marked tracks. This is entirely the parties call.

Follow signs from Mansfield (your last stop for essentials) to Mt Buller. Having paid your entrance fee Once at the Resort Entrance Gate (cheaper if you plan ahead, click here for rates), take the hard left turn down through the parking area following signs to Telephone Box Junction (TBJ). Here’s a handy google pin to help… This dirt road is winding and can get pretty slick with a low freezing level. Carrying chains is mandatory and luck always favours the prepared, if there is snow in the cams at TBJ fit chains earlier rather than later. Once at the broad carparking area adjascent to TBJ, park up and ready the team.

The entire ski area is patrolled by the Mount Stirling Ski Patrol where the ‘women are strong and the men are bald but very good looking’. At TBJ they will need you to complete an intentions form at the patrol desk / info board even if not manned, and they want everyone to follow these ‘Mountain Safety Practices’ where they state: Mt Stirling is an alpine environment and the weather can deteriorate rapidly. Poor visibility can make navigation very difficult. If you become lost or injured don't panic. Stay where you are, don't keep moving until you are exhausted. Shelter from the wind, stay dry and light a fire. Place your skis crossed, upright in the snow near you in a prominent position and attract attention by blowing your whistle. The distress signal is three long blasts, repeated at one minute intervals.
In case of emergency initially contact the Mt Stirling Ski Patrol at Telephone Box junction (0409 945 901) or any ski patroller.
Mobile reception is pretty good along the ridge tops and the summit area, less so in the bowls and gullies.
Also there are Trail Map location points that reference the map. These are located at junctions and points of significance. A snow pole line transits the summit connecting the two approaches to the summit. A navigation handrail in poor visibility.
The mountain has several areas that can develop avalanche hazard both wind slab and wet slab depending on the conditions. The known areas are the small headwall at the top of the Dugout Bowl, and the entire area South or East of the South Summit (Stanleys Bowl). The avalanche terrain is indicated by ridge top exclusion barriers. Ski Patrol will close these during periods of heightened concern. The forecast for avalanche hazard are published here https://www.mtstirling.com.au/snow-report/ and supported on the MSC site. Always use the dynamic tour grading provided by the daily travel bulletin at MSC for reference on the suitability of this terrain to your party as set out here.

It would be hugely remiss of ‘the Companion’ not to make mention of Telemark skiing. Stirling is a mountain made of the mystical mythical free heeled drop knee turn. Personally all the authors of this section were born and bred telemark and owe so much to the googly chaos of that tradition in making us the spectacular alpine skiers we are today. Teaching yourselves to ski telemark in less than ideal conditions is representative of the famous quote ‘The definition of insanity is doing the same thing (falling) over and over again and expecting a different result (actually doing a telemark turn).
As an introductory tour we suggest that alpine touring and or split boards are the mode to allow the a party to sample the delights of the mountain at an ‘introductory’ level. Telemark, whilst being what all us old plonkers grew up on, would make the tour ‘intermediate’ even on a perfect day. Graduate to Telemark, and don’t knock it unless you’ve nailed it. It has appeal in its mastery. And yes the plonkers will be looking and thinking… all you young bucks with the new fangled gear are cheating!
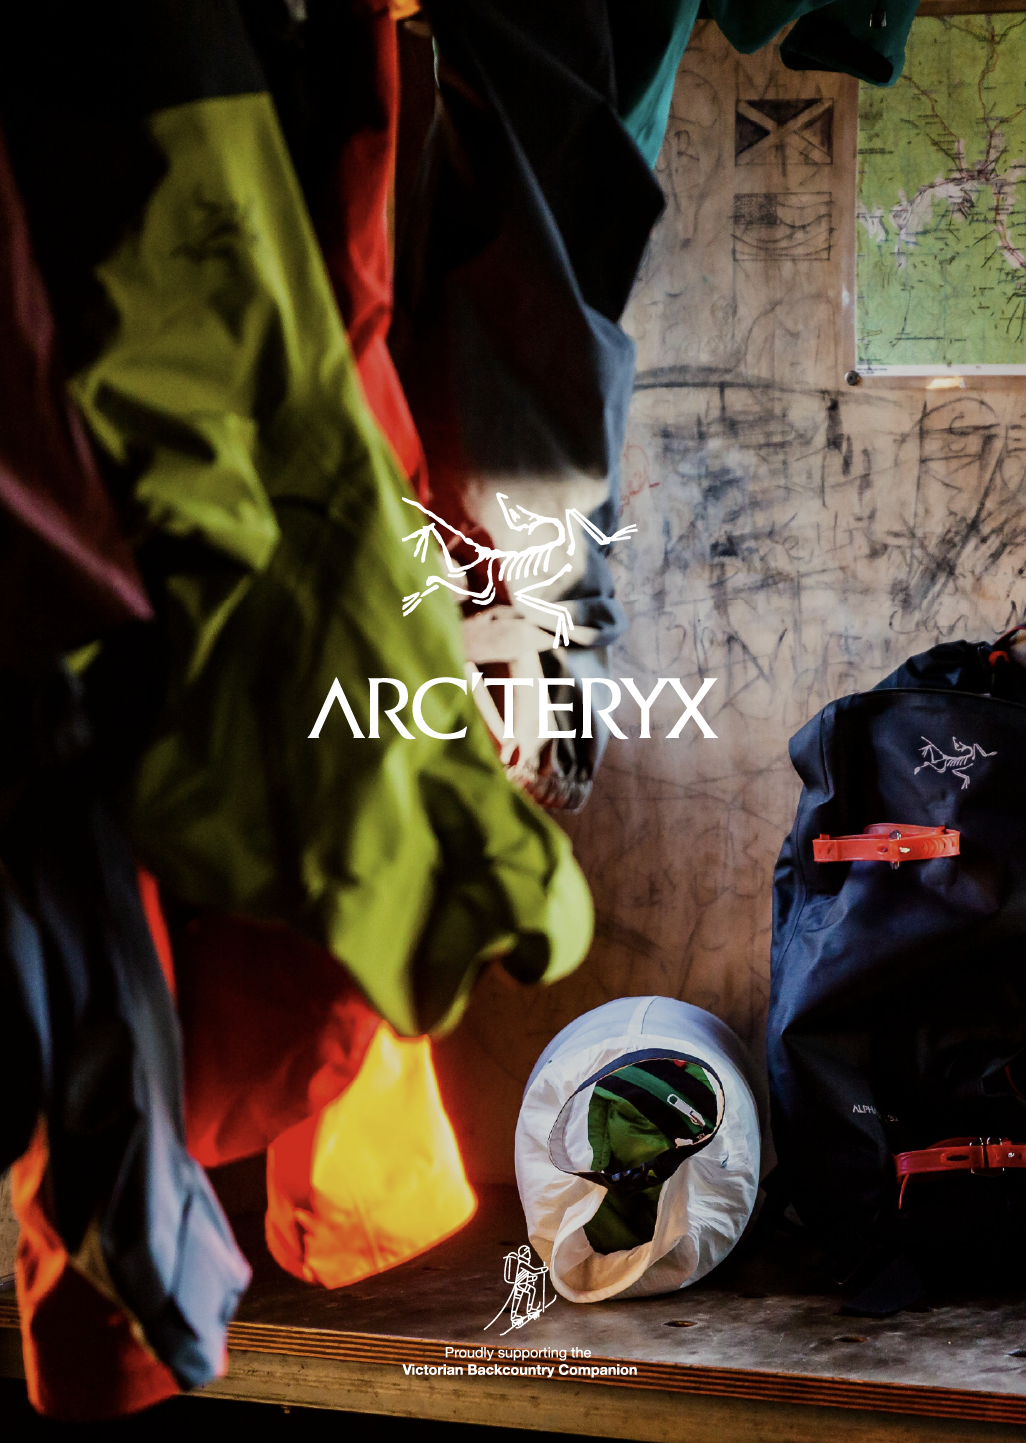
Camping
Snow camping is by no means an easy undertaking. Simply skiing with a pack on is a feat on its own. Carrying everything for a night or two out, getting it in the pack and ideally under 16kgs is technical stuff. Dehydrating food, working fuel stoves, boiling snow for water… Layers of clothing, and most challenging: managing your working temperature whilst underway. These are all exciting but complicated and nuanced challengers. With the support of the hut network and the ready assistance of ski patrol, there is really no better place to start… ‘ you gotta start somewhere’ right?


Grinding up the hill.
Image courtesy of The Mountain Journal: Stirling -Let’s get it right. An important read for anyone headed out here. Pic: Charles Street
Underway from TBJ
Most parties head up via Bluff Spur and gain elevation quickly. This is an overnight tour so we will be easing into the mode of uphill with the pack on. The route we describe here is your easiest descent and holds snow longer, later and lower in the season than the exposed Bluff Spur. With the intention form filled, from the Cafe, there are two obvious paths. The high road and the low road. The high road is Circuit Road to Mount Buller, the low road heads out to King Saddle Shelter (not to be confused with King Spur Hut - which is your objective). Take the low road to the junction on the right, signposted as No 2. Turn right onto the ‘Baldy Loop’ trail here. Stay on Baldy Loop, avoiding the various creek crossing on the left to cross further soon before arriving at No5 Post. Here take the right fork to follow Upper Baldy Trail.

Things get easier navigation wise from here as you ascend taking all right hand options at forks posted 26 / 33 / 30 / 31 & 36 via Wombats Drop and the Stirling Trail to King Spur Hut. A distance of around 3km. The pitch of the trail picks up on the Upper Baldy and it might be time to ditch some layers such that you don’t over heat and ‘wet-out’ your inner layers. Check the crew and make sure everyone has that in mind. It’s a bit of a grind for an hour or so.

A ‘Quick aside’
Literally, a quick aside (If you know the way it is quicker and it is off to the side), for those who want to test their off track navigation and really get into the un tracked and unpatrolled backcountry, at the sharp left hairpin turn (at elevation 1400m) roughly a kilometer past No6 post is the access to the Upper Baldy Glades. If you get to the machinery shed you have gone too far. Contouring off the trail from the hairpin in roughly an Easterly direction, you will be forced to cross over some big fallen timber and a small creek. Continue contouring, gently traverse upward gaining 40m elevation over the following 500m to the intersection with Baldy Creek. Down slope the creek disappears into thick tea tree scrub, and above the wooded gully gradually opens into snow gum groves and glades. Follow the left bank of the creek up until at the creek fork at 1490m elevation, the skiers righthand (Eastward) option is the obvious path to take. 200m up from the last fork in the creek is an open area ‘Granny Flat’ area. The hut is another 500m up the creek. This option cuts out the flat slog across the ridge between post 31 and 36. If it get weird and you feel lost, simply back track to the established trail and head up that way instead. The GPS plot provided has this option in the ‘noodle’.

King Spur Hut (Hut 36)

Stocked with timber and ready for parties! King Spur Hut in fat conditions.
This is the newest hut on the mountain and accommodates several parties comfortably. From here the summit area is only 1km distant with an elevation gain of 200m vert. Those are fun numbers. Perhaps call this camp for the night, although ideally it’s only midday (working off a 9am start). Scoff some grub, re-pack and grab your day kit, include avalanche gear / ski crampons and let’s explore more.

Mount Stirling summit area
Continuing up along ‘Stirling trail’ from the hut you will ascend more steeply on the SW side of a ridge. Stirling Trail intersects with the West Summit trail at Post No37. From here it is possible to take an undulating traverse to the Bluff Spur Hut. A frustrating experience without pattern base skis or skating thighs of steel. If the weather permits (its not a side ways blizzard) head left at Pole 37 to the GGS Hut.
Geelong Grammar School likely forks out quite a bit of cash to have the privilege of this accommodation so high on the hill. Theoretically it’s public for the purposes of emergency shelter? If a gang of school kids turns up you are gonna want to move on though.
Beyond the hut, above the first of the snow poles is the lower north face of Mt Stirling at pole No8. From here the trail down on the broad spur skiers left heads to Clear Hills and Craigs Hut (rated as Advanced terrain for good reason), to the right, the pole line leads upward SSE to the saddle. To bee line to the summit ascend the flank on the skinners right of the pole line.
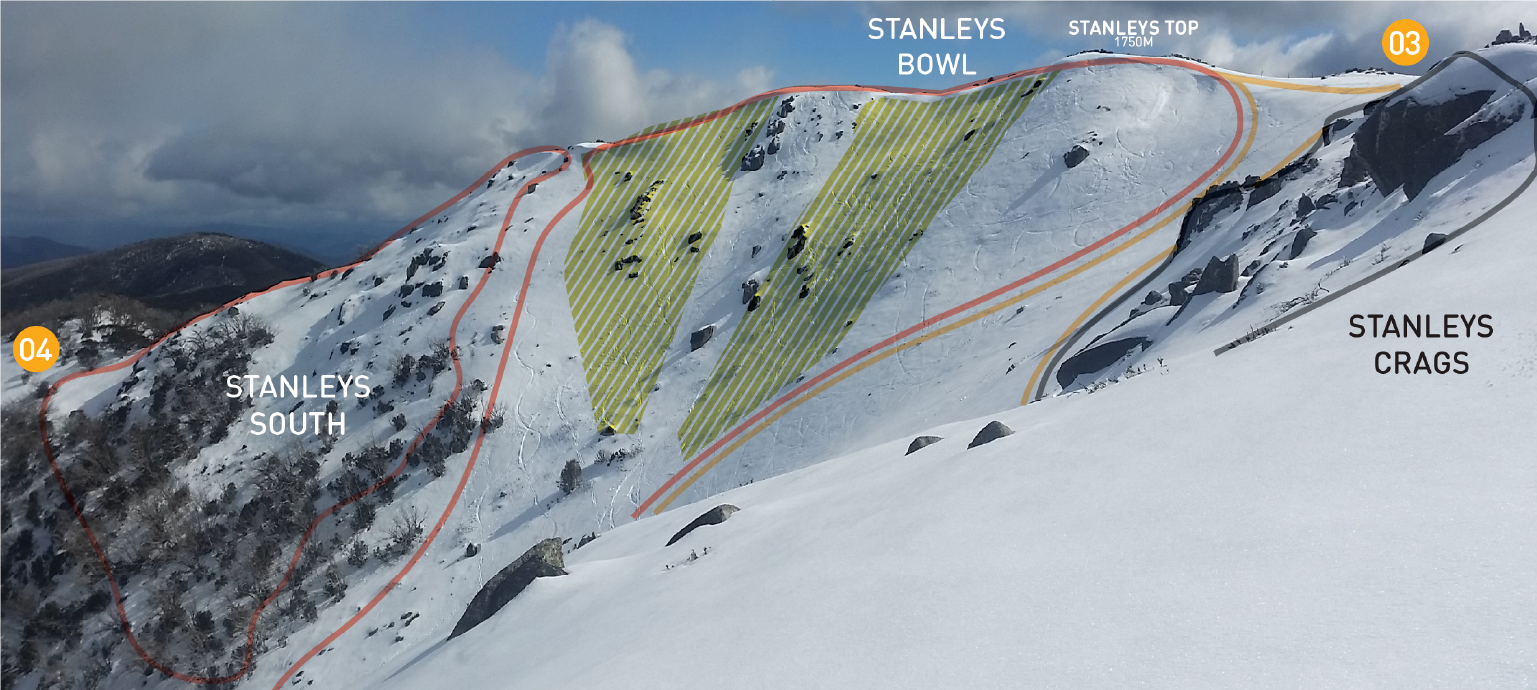
Stanleys Bowl. The Bowl is divided in three parts, all varying between intermediate and advanced terrain, the yellow section shows known avalanche terrain.
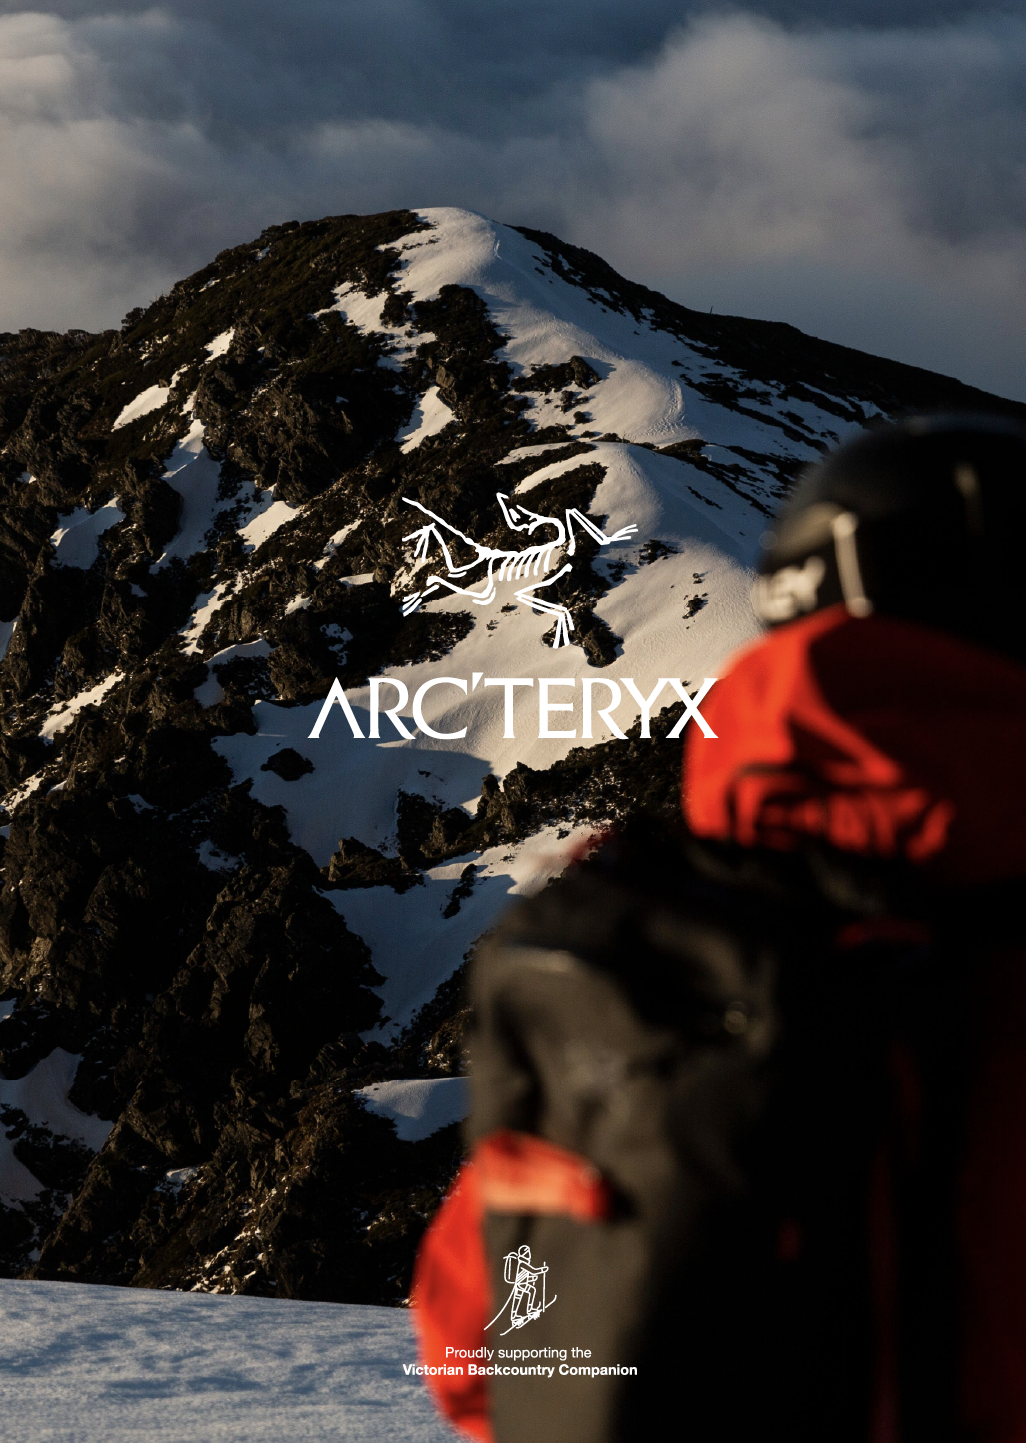
Mt Stirling Summit.
The summit area is kind of treeless peanut shaped expanse, with two high areas separated by a shallow saddle. Both the high points, the summits are within meters in elevation of each other only 300m apart, the true (West) summit being where the ‘peak bagging’ happens, and the views west to the plains are enjoyed. The highpoint of the saddle pole line has a marker Pole 39 at it (emergency cache here too). The east summit, or ‘Stanleys Top’ (03 on our map) is where the steep skiing happens (topo provided for reference), this is Intermediate to Advanced terrain , with the views east to the greater ranges. There’s a brave singular gum tree (The Tree) that clings to the east side of the saddle area. A good landmark when the visibility wanes.
From the area North East between the pole line and the snow gum is the expansive gentle ‘Dugout’ bowl. This is first class ‘intro to backcountry’ terrain. Spaced trees, good aspect to get ‘early softening’ in a melt/freeze cycle and generally ‘the place to be’ (get’s tracked out quick).
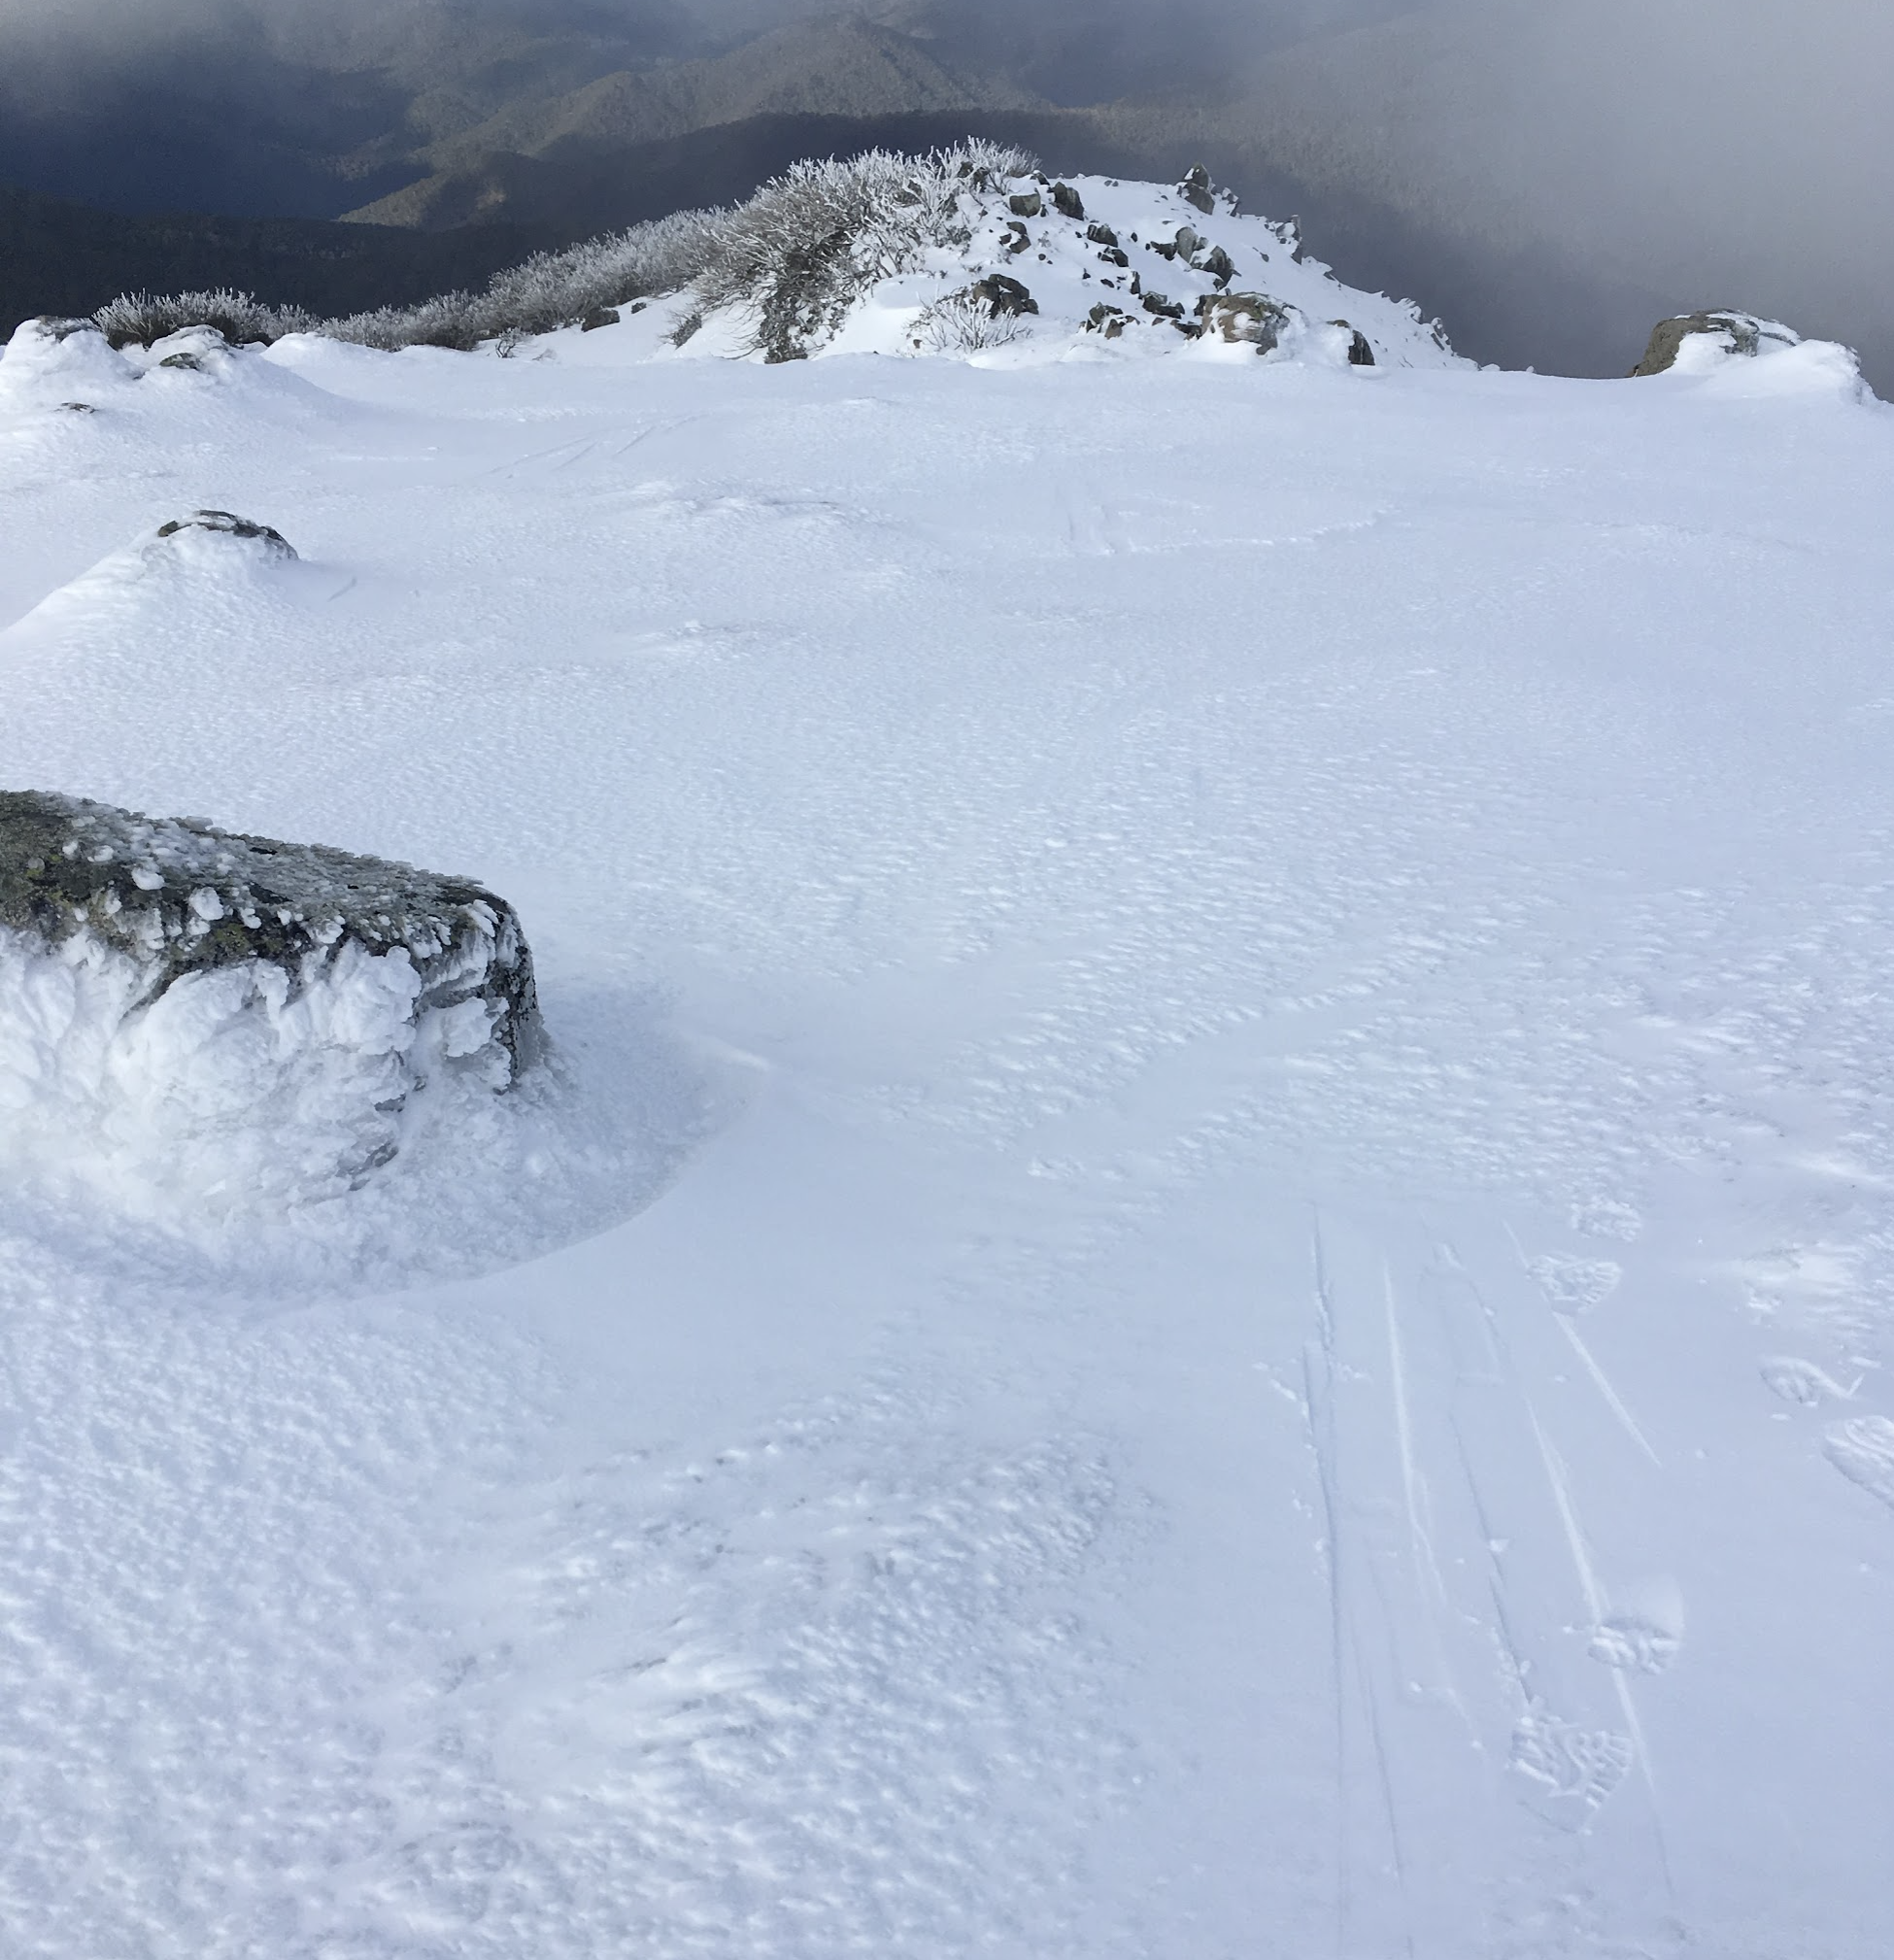
Rime Ice: Note how skis have left no impression in the ‘cauliflower’ ice.
WARNING: Surface rime and melt freeze crusts on or above steep ground.
Be very wary when the surface looks like this. We call it ‘cauliflower ice’, This dimpled surface is usually super hard, un yeliding to the skiers edge and a fall on this without an ice axe is very hard to arrest. In these conditions ski crampons or boot crampons and axe are essential for safe travel. This is the view North along the ridge beyond ‘The Tree’ with Stanleys Crags on the right and the Hang Out gully on the left.
Should you choose to head across the saddle to Staneys Top things get a bit spicier, particularly if the visibility is challenging. The west side is often subject to a thick veneer of surface rime or just straight up bulletproof sheild ice. The leeward aspects below ‘the tree’ are prone to cornice and avalanche. Usually marked by orange snow stakes, the ‘gates’ to Stanleys Bowl comes into view on the east side beyond the tree, before the Stanleys Top. The summit area east of the stakes is usually corniced. An indent on the ridge true east of ‘the tree’ is a deep steep scour at the top of ‘Hangout Bowl’ which also windloads and cornices heavily. Take care out here. There is more detail on the advanced skiing in that section of the companion (available June 2022).

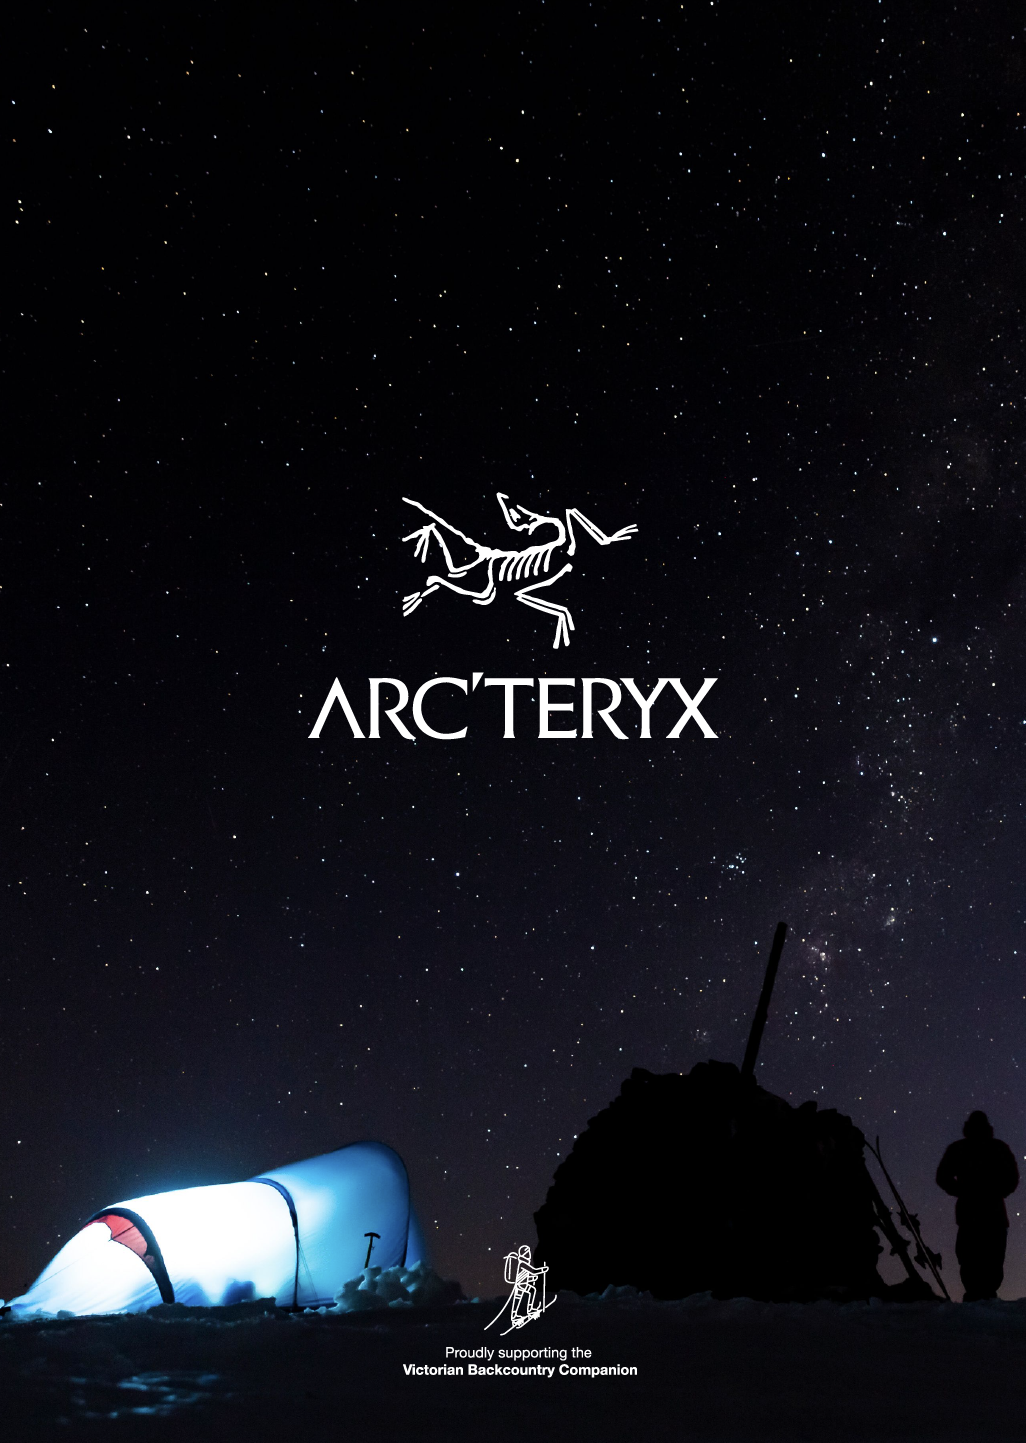
Room with a view. Camping in bluebird conditions in the ‘Hangout’.
Hangout is a ‘ridgetop depression / gully’ (geographical anomaly?) set below the nearly vertical scour on the spur between Stanleys Bowl and Dugout bowls. Something of a hanging valley on the ridge that provides a good sheltered high camp to stake out a fresh conditions in close proximity to the bowls.
Bluff Spur Hut
From the pole line transiting the saddle head south and west following the poles. Heading skiers right where the gum grove stands on the right hand side of the poles also connects just 30 vertical meters below to the continuation of the ski trail. Either way take all turns ‘skers right and you will arrive on the flat narrow saddle connecting Bluff Spur with the broader West Face of the summit at Track Marker 41.


Bluff Spur Hut. A Victorian backcountry institution. Pic: Cam Walker
A well built, well appointed but small almost ‘too cosy’ hut. This thing gets cooking… pretty much a party venue most weekends. And a good one at that. Steezy apre sipping splitters, portable sound system stompers, igloo building exercises, frothing telemarketers selling the virtue of the free heel turn. It’s the Bluff Spur Hut scene. Welcome, sit down… enjoy the weekend circus.
On a serious note, cooking inside on fuel stoves is pretty noxious. Use the balcony or dig an extra kitchen. Be considerate and keep the party indoors after 9. The snowcam is on the roof so if you want to see what the conditions are like, the Bluff Spur Hut is a window to the web.
Bluff Spur to Telephone Box Junction
Literally from the steps at the door of the hut to TBJ is a 6km descent. There are a few flats in that distance to work up a skate sweat. A few speedy blind hairpins too, so watch out. Not to mention that lower down the spur, the snow burns off earlier in the season so twig sharks lurk waiting to trip you up. Not to encourage it, simply as a guide it has been done inside 15 minutes. So if you need to get out quick, this is the ‘rip cord’. For the day tripper who wants to tick the summit, slay a few laps in the bowl and get back out, then Bluff Spur is the practical fast ‘in and out’ option assuming there is sufficient snow cover. Don’t forget to ‘sign - out’ your intention form.
Other stuff
From beyond the Summits heading along the ridge toward Mt Buller there are some awesome unpatrolled areas for the more experienced parties. The Howqua Gap Trail with fresh snow is, like Mt Erica, an esoteric Vic Alps classic technical descent. As is the River Spur trail. Out on this side, particularly Corn Hill there’s been lots of MTB trail building and some of this skis well in a very narrow winding fashion if you are into that kind of thing, not sure what the Ski Patrol policy is… It’s all unpatrolled out here so you are on your own.